Caution: this a dangerous project: safety goggles absolutely required !
Here is a low cost (less than 500$), powerful (40 Watts continuous), visible ( blue 445 nm) laser
The key component is the blue laser module from a Casio XJ-A140 video projector blue laser source. (I bought my Casio second hand working XJ-A140 for less than 400$ in France)
This source is made with 24 x 1.5 Watts 445 nm blue laser diodes installed on a heat sink, 3 fans. Each laser diode is collimated, then each beam is reflected on a Jacob's Ladder mirror in such a way all 24 parallel beams are directed on a lens which focus it on a single point. It allows to melt stones...
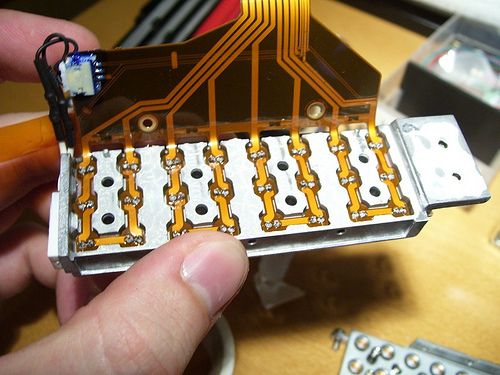
In the Casio laser module, there are 4 electrically independent groups. Each group is made with six 1.5 Watts 445 nm laser diodes daisy chain connected.
All that is connected through a soft printed board and a miniature SMD connector to the Casio controller print board. Plus 10k thermistor control, 100°C security switch...
It's very difficult (for the amateur) to connect to the SMD miniature controller.
So we choose an alternate way: on the soft printed board, for each of the four groups, there is a protection diode (probably a Zener diode to protect laser diodes from electrostatic discharges.
On each of these four diodes we connect two wires. These 8 wires are connected to a standard 9 pins female SUBD connector Through 4 x 5W 1 ohm power resistors.
Pins 1 2 to ground, pin 3 for fan, pins 4 5 for Vcc. other pins free for future.
(Note that this way allows to reuse the optical laser module in the XJ-A140 if necessary...)
And we use a 2 m mains cable equipped with 9 pins SUBD (1 male and 1 female) connectors to connect to the PSU (Power Supply Unit) to the module:
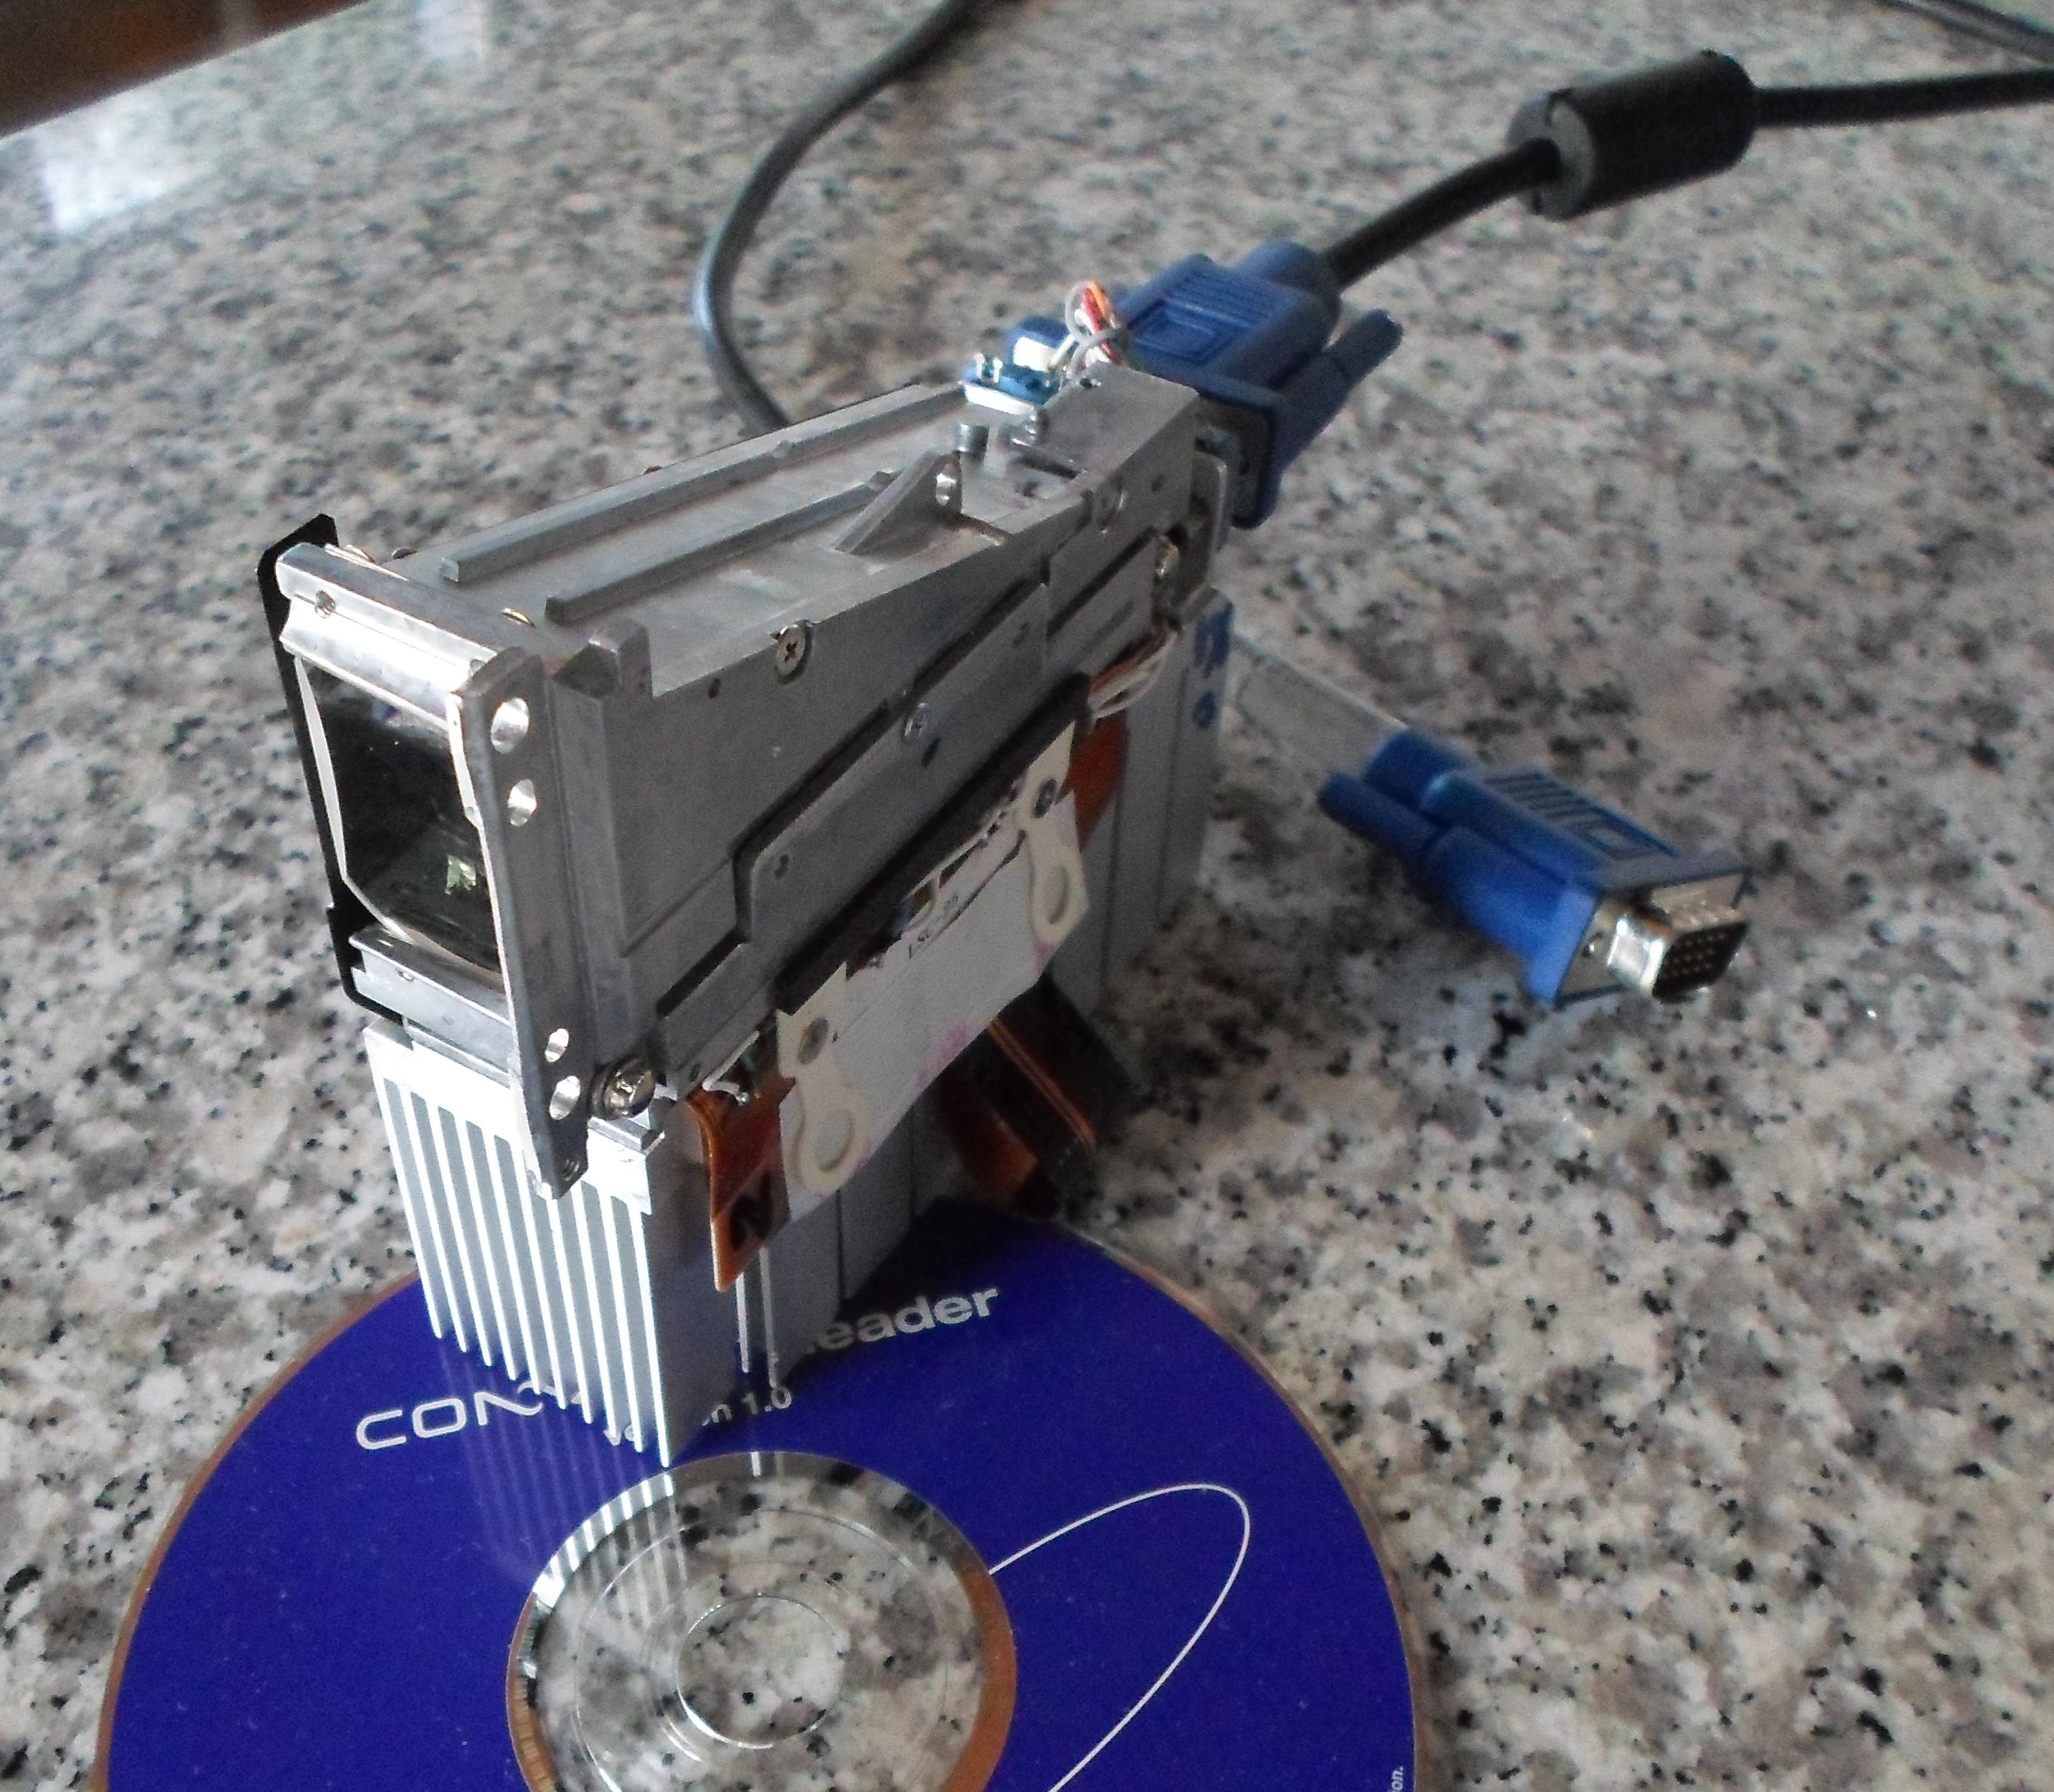
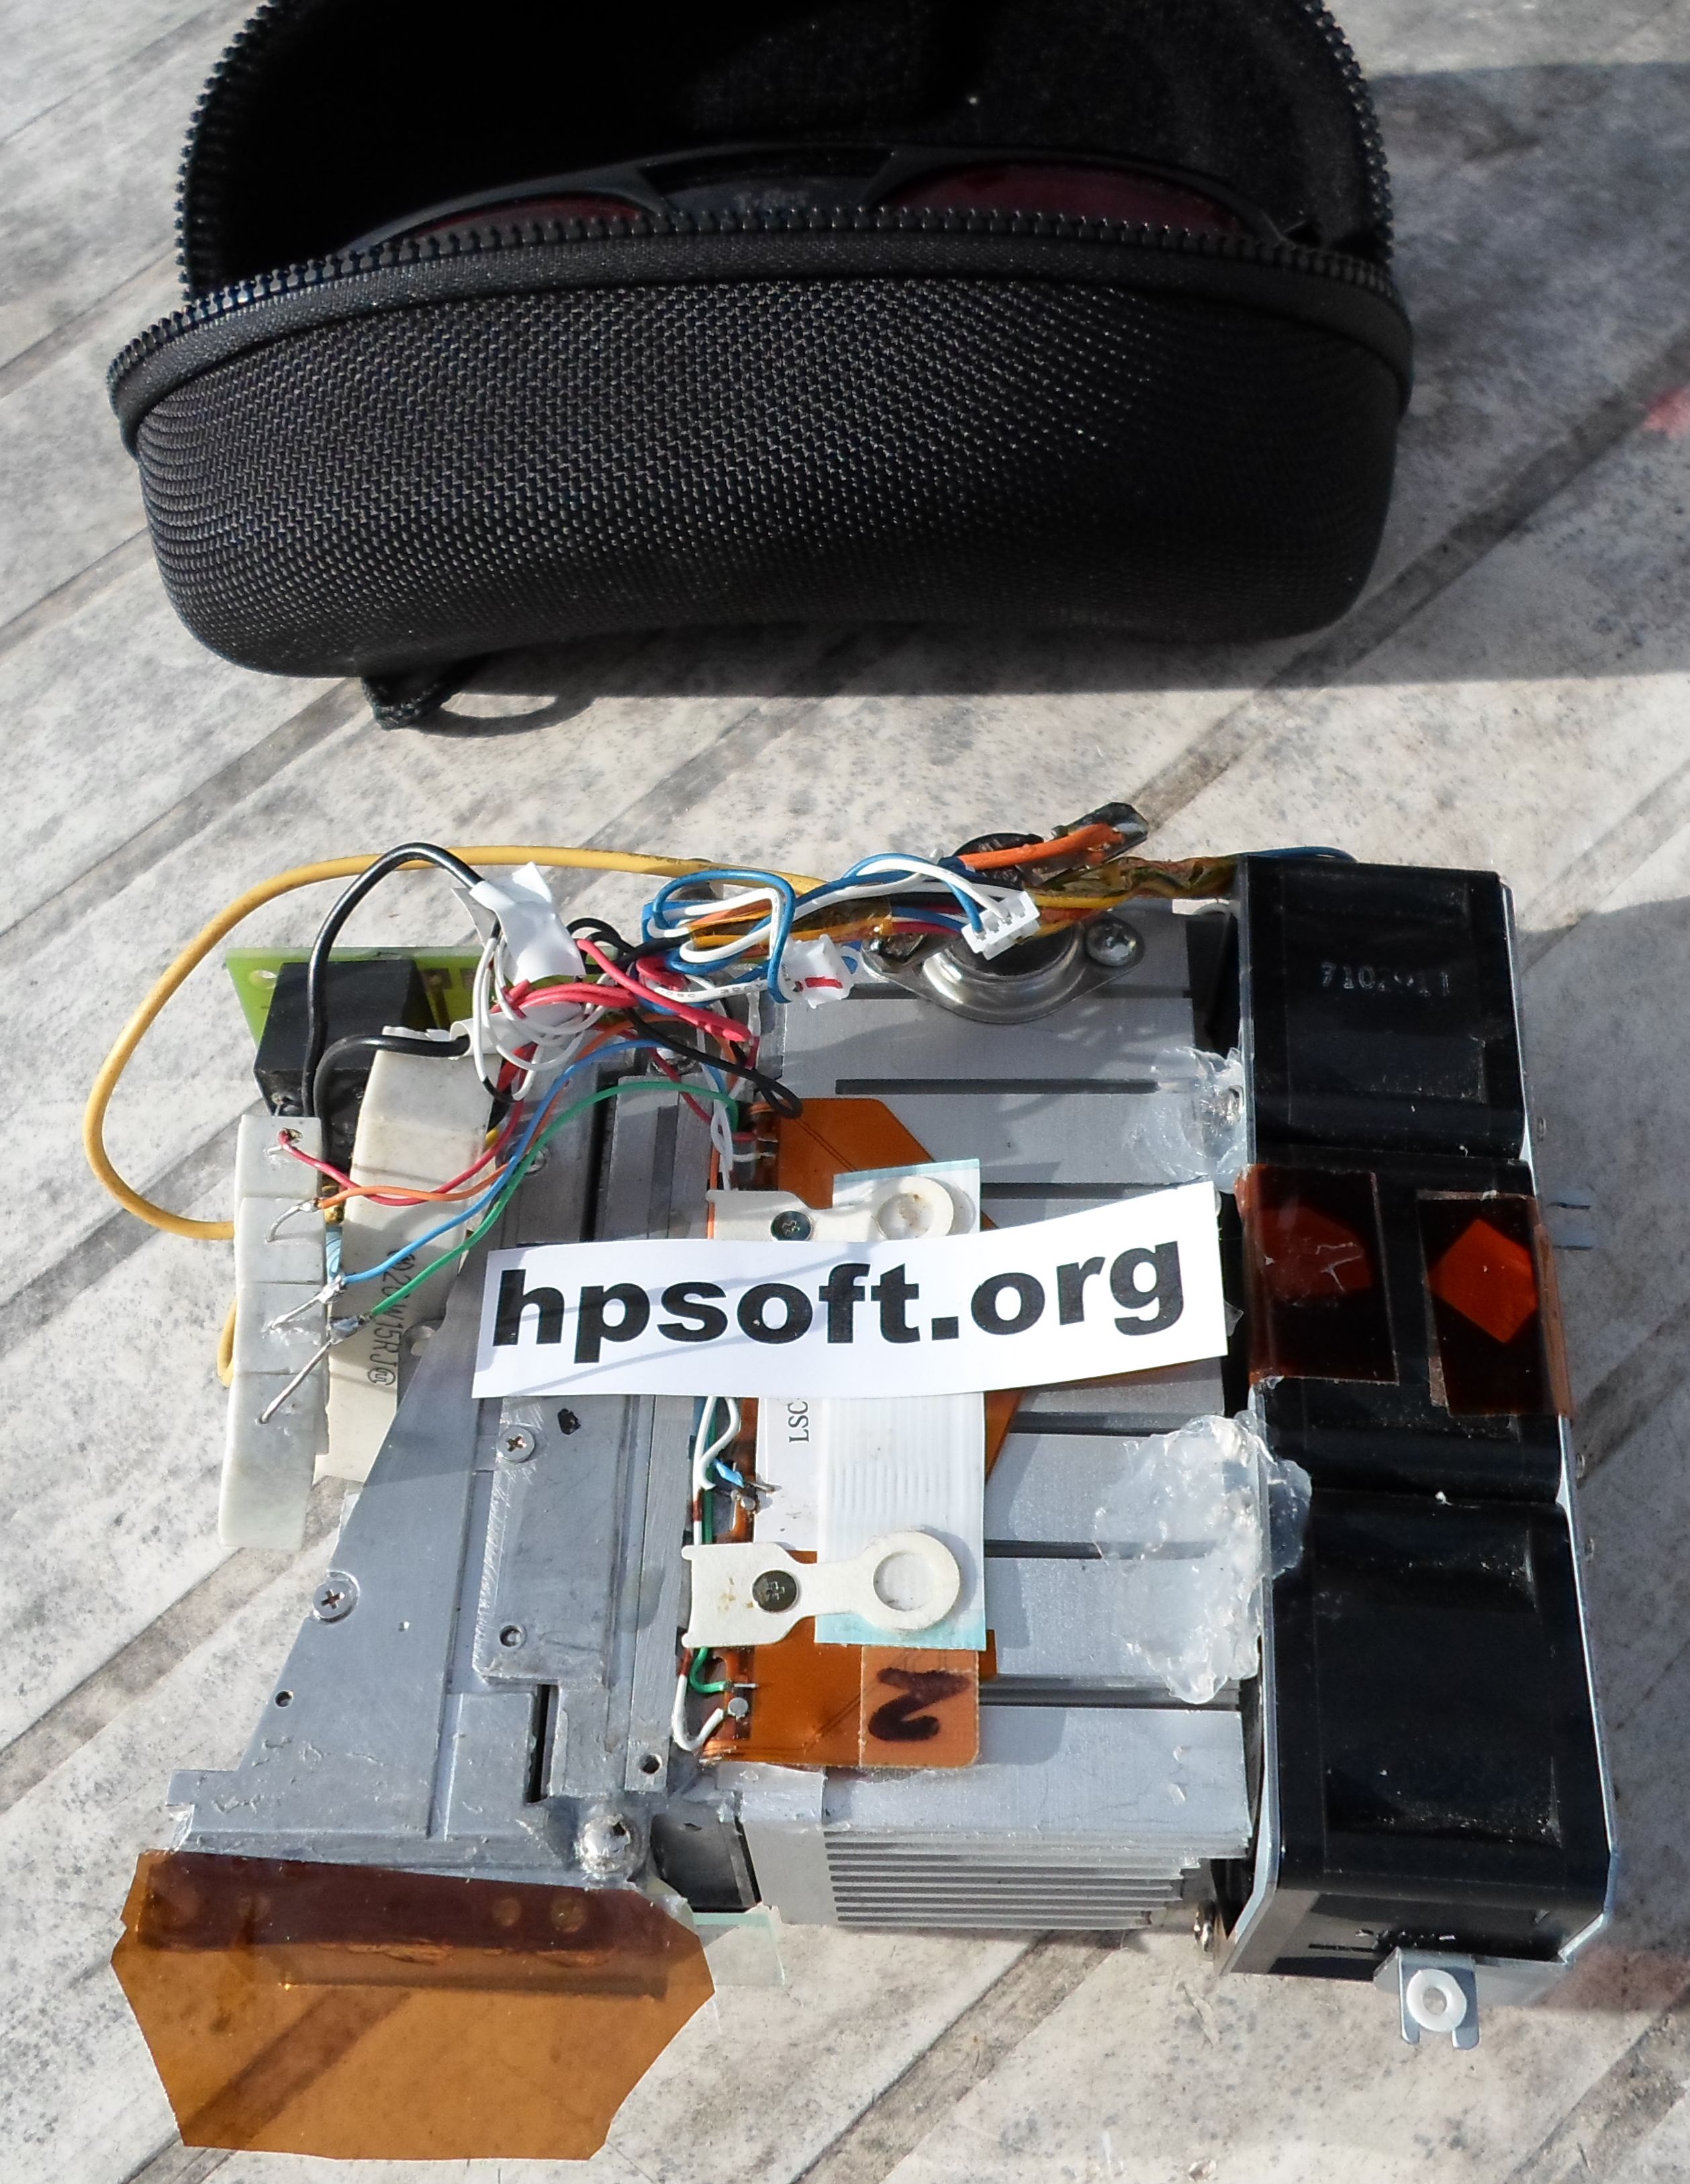
From Left to right:
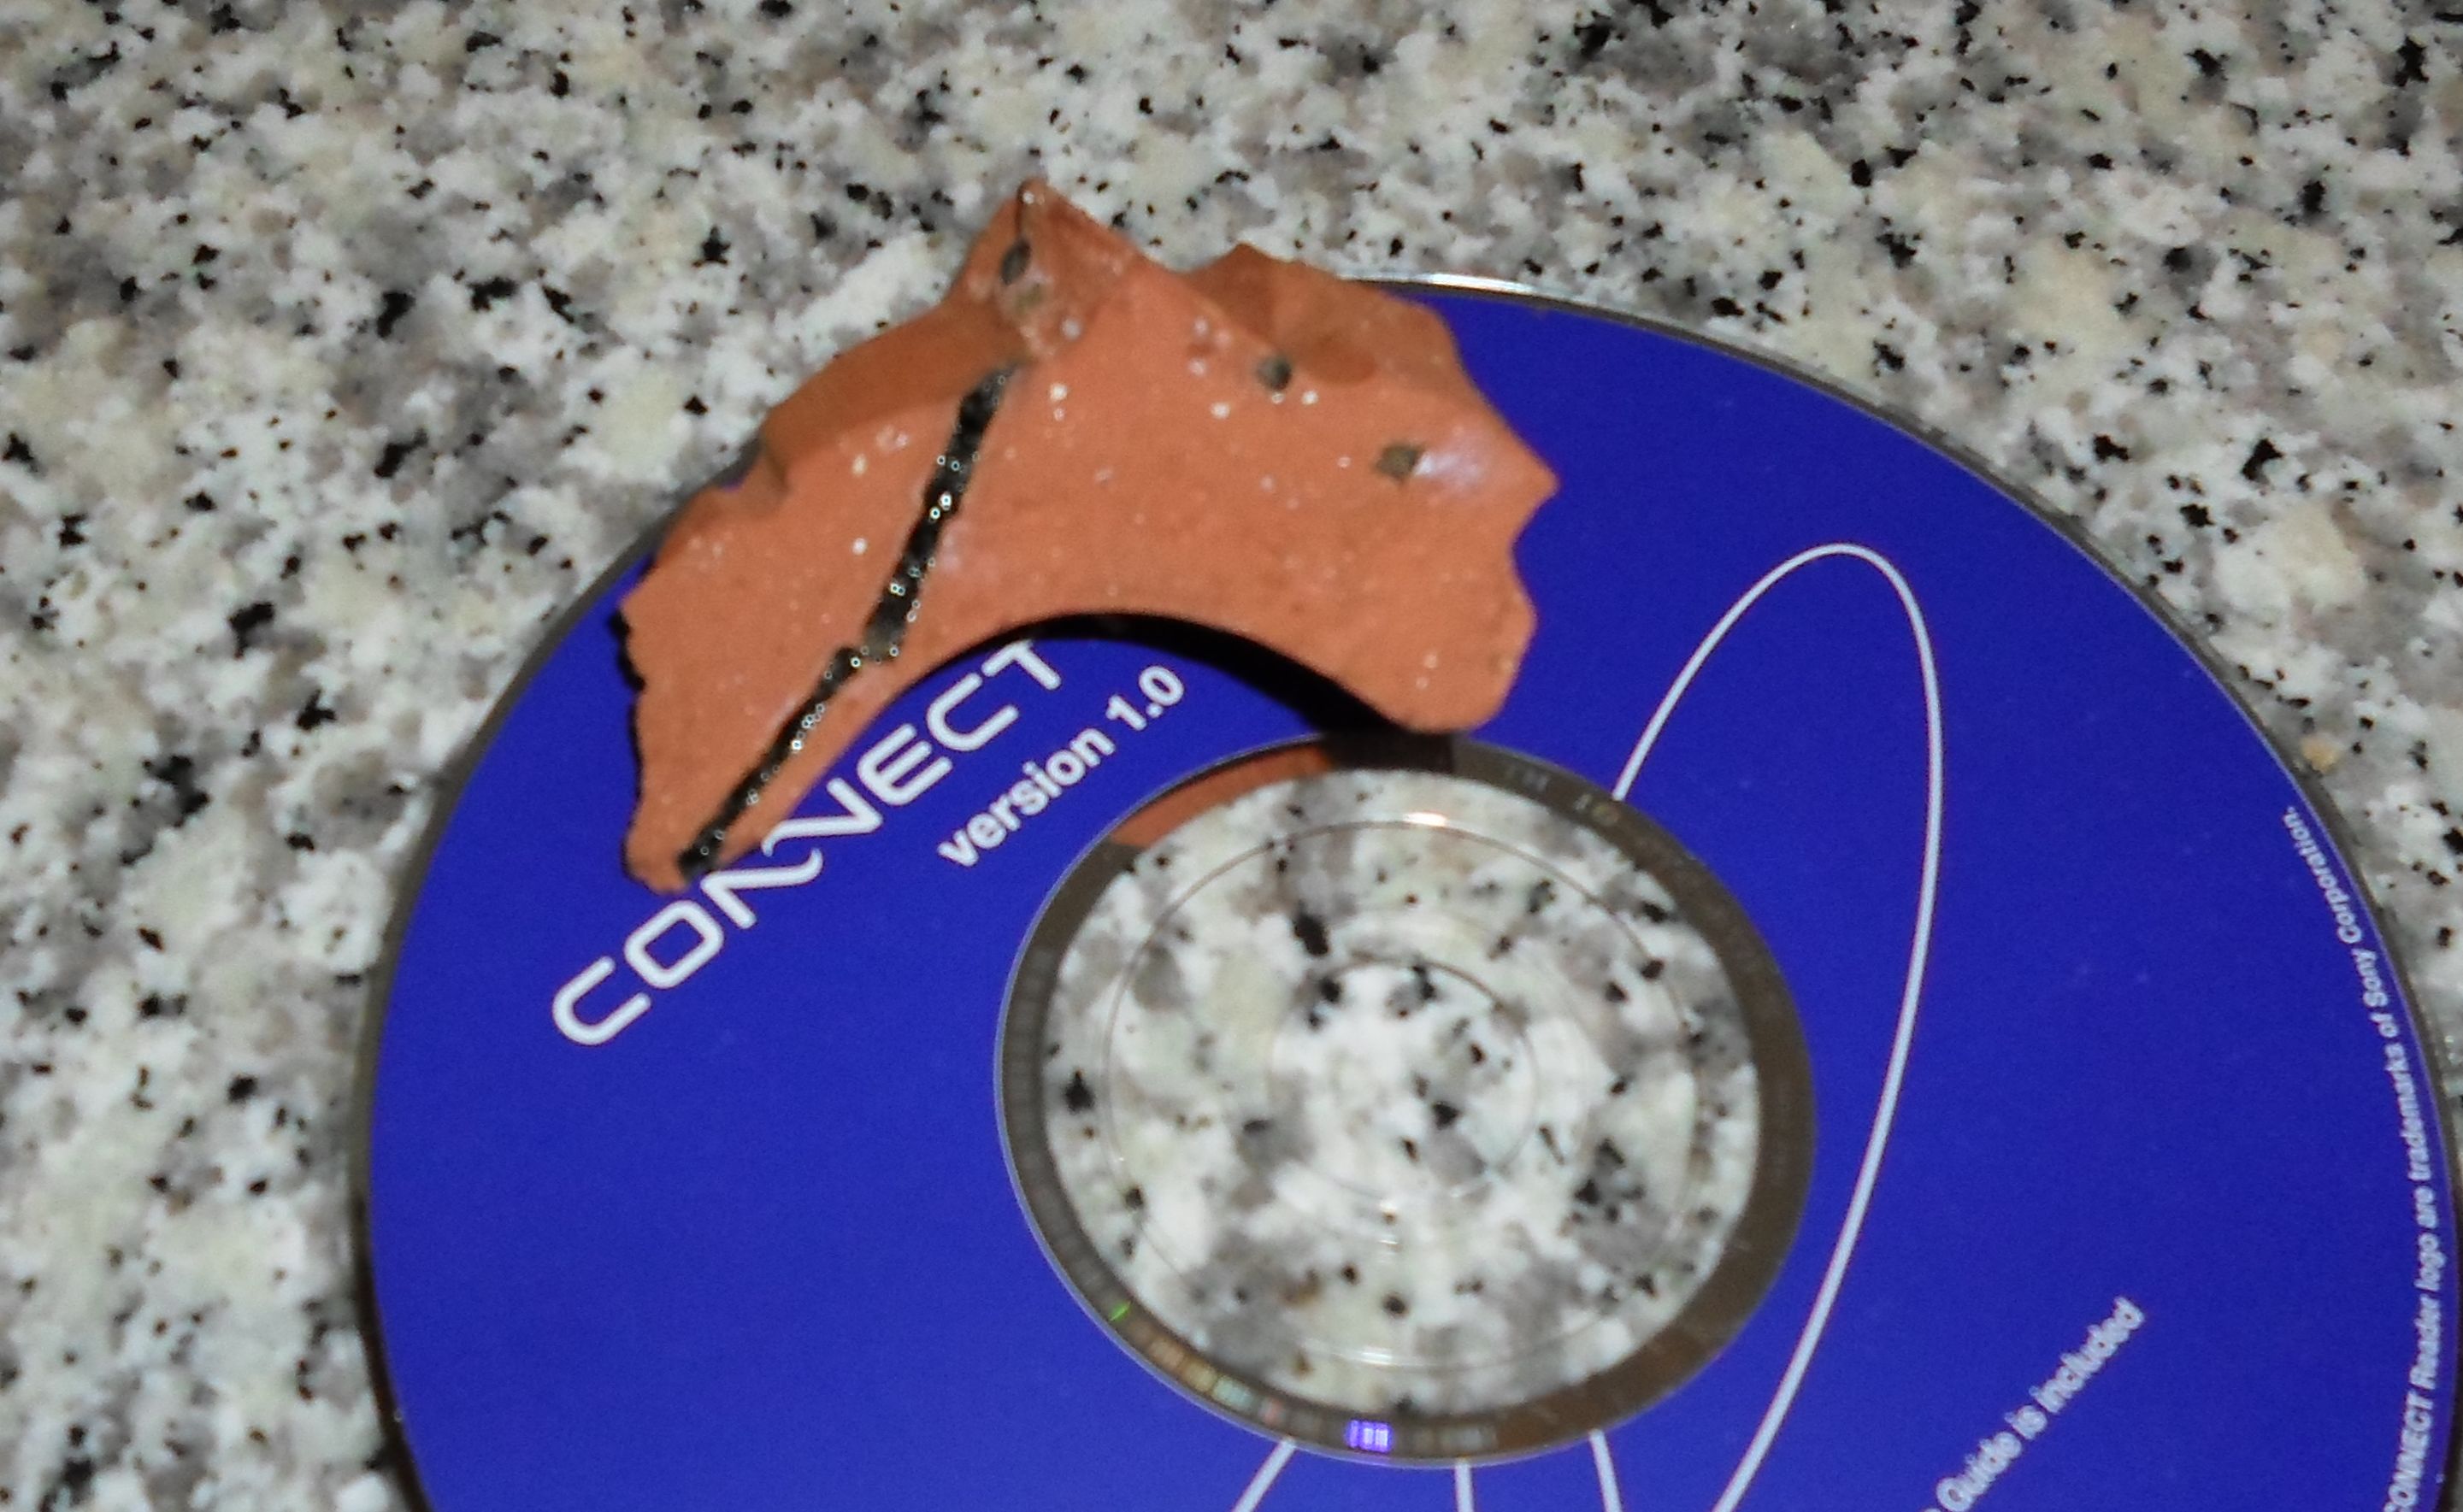
CD (just for scale)
The output lens
Heat sink (no fan on the picture)
Jacobs Ladder mirrors are on the top, below is soft PCB with protection diodes and wires
On the back is SUBD 9 pins male connector connected to the four diodes power resistors
and the standard 9 pins SUBD cable.
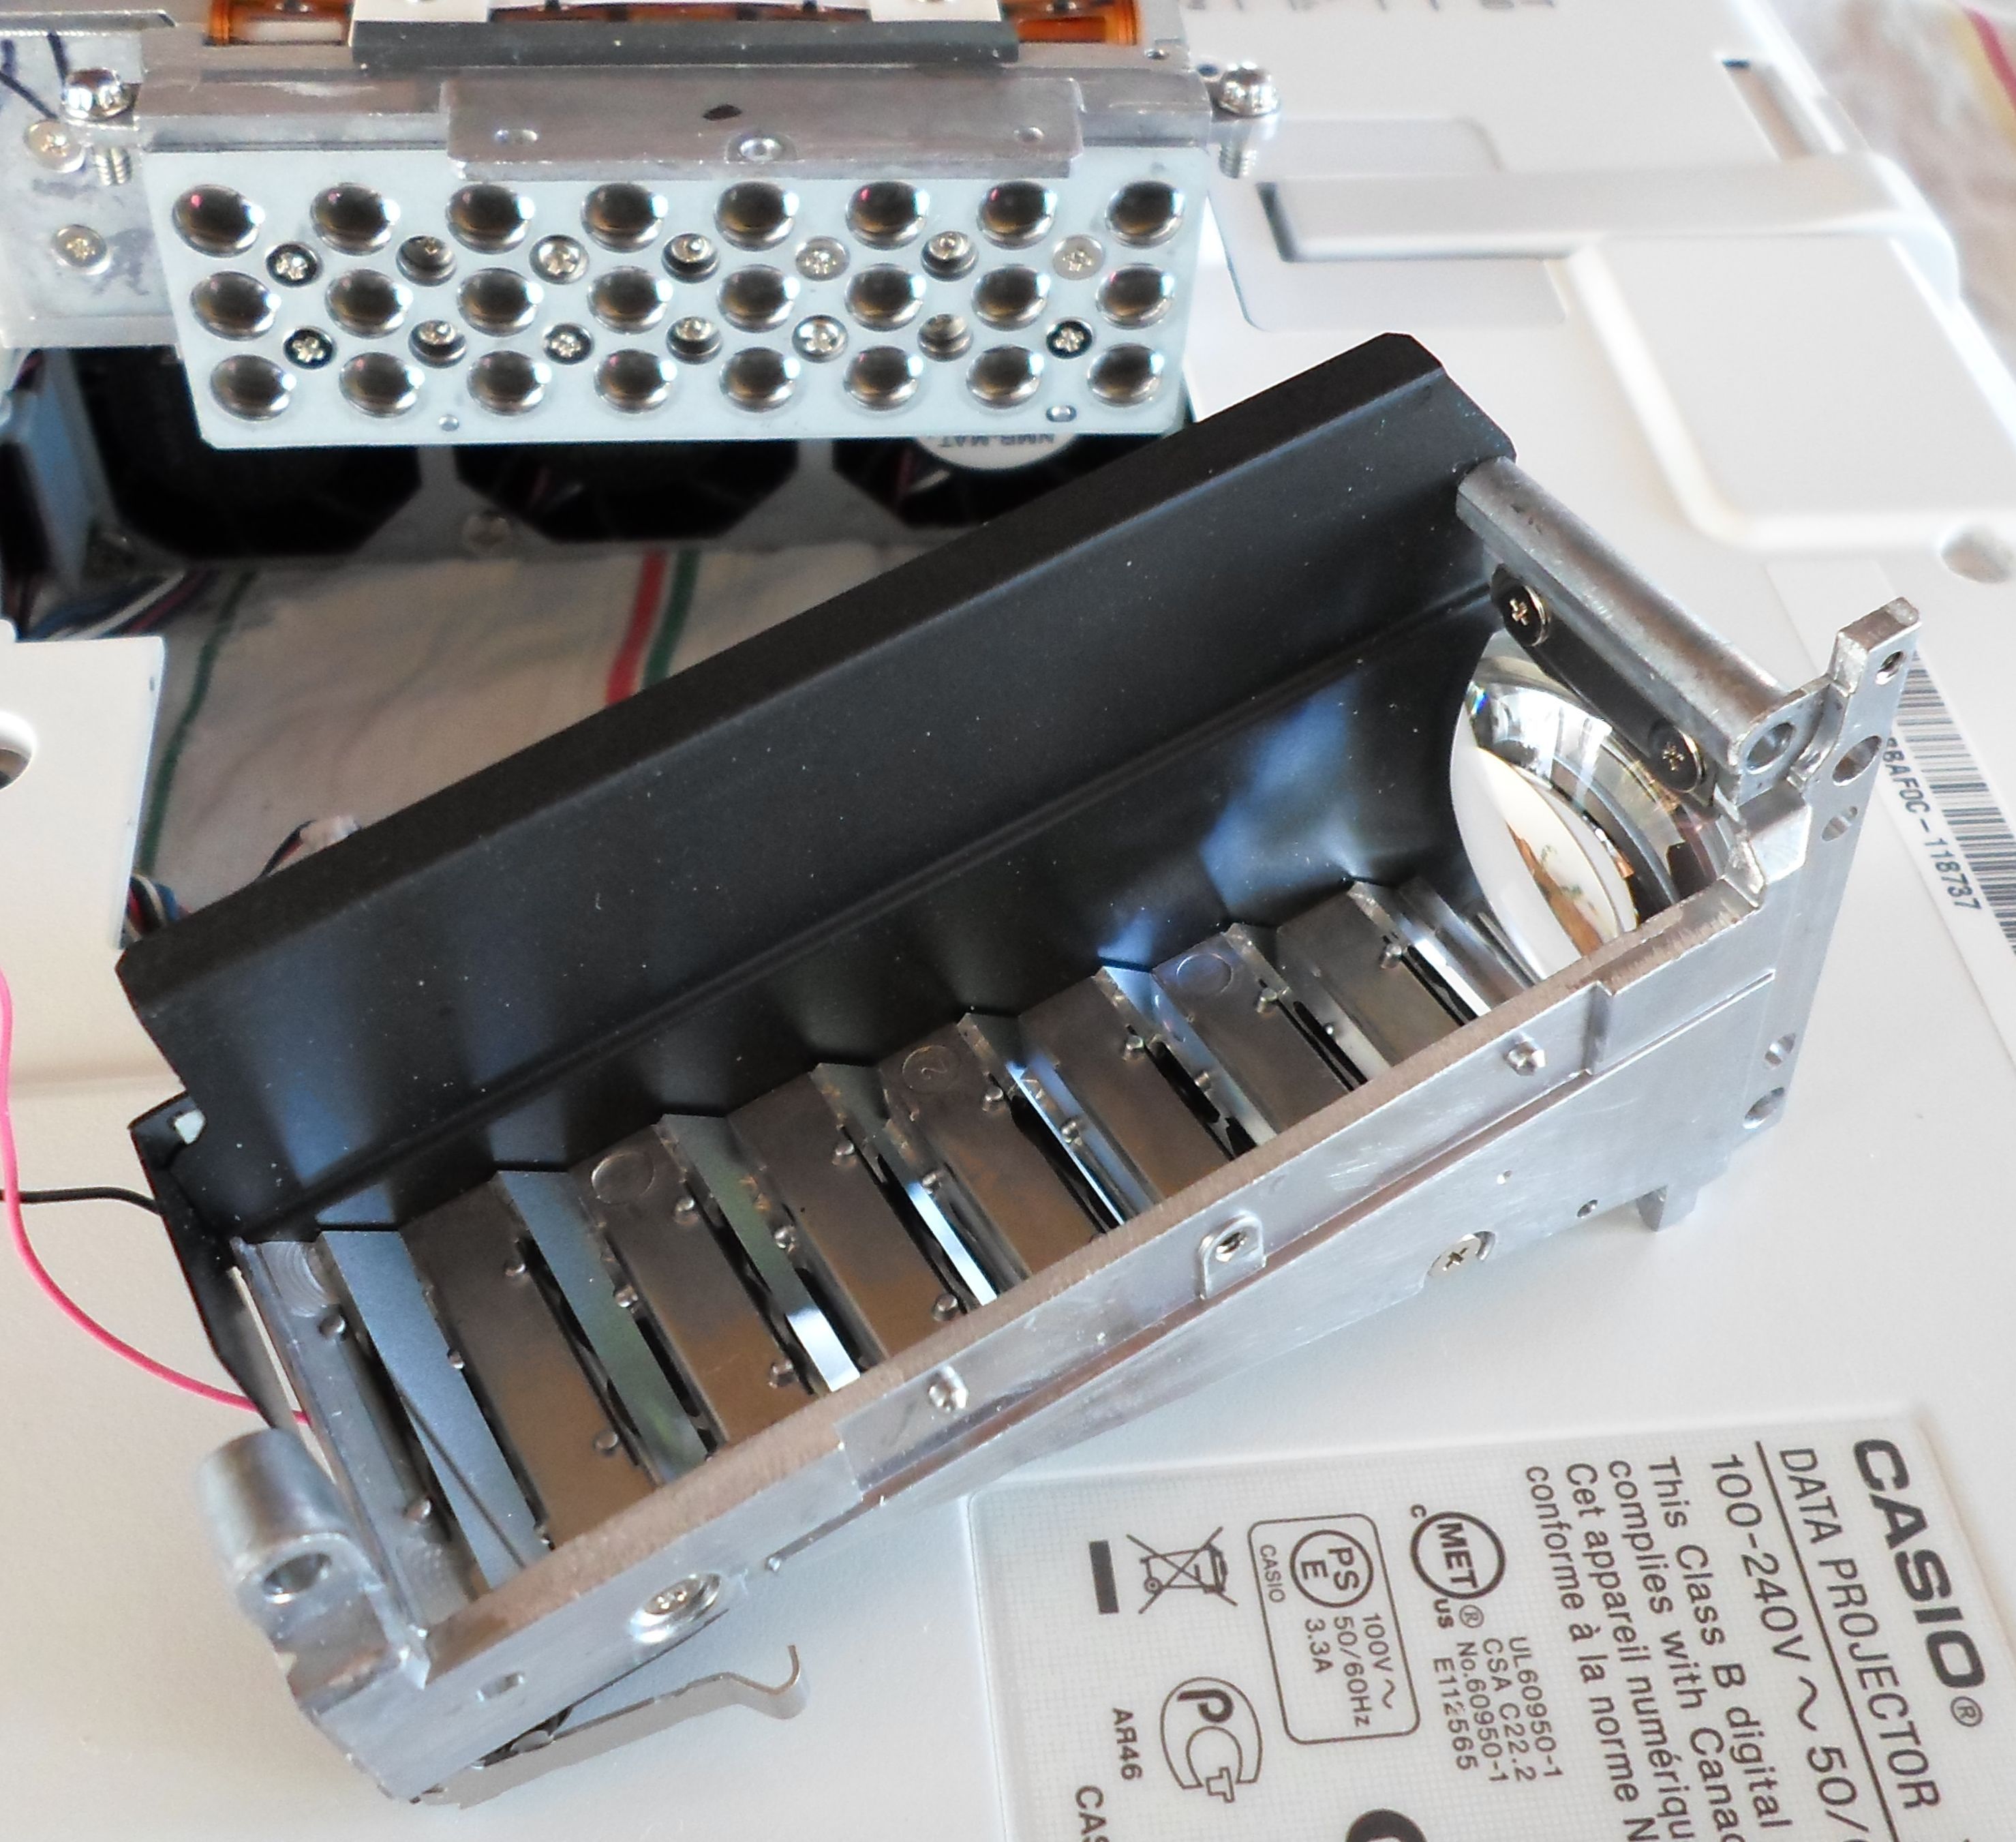
Here is a more detailed pictures inside Casio laser module:
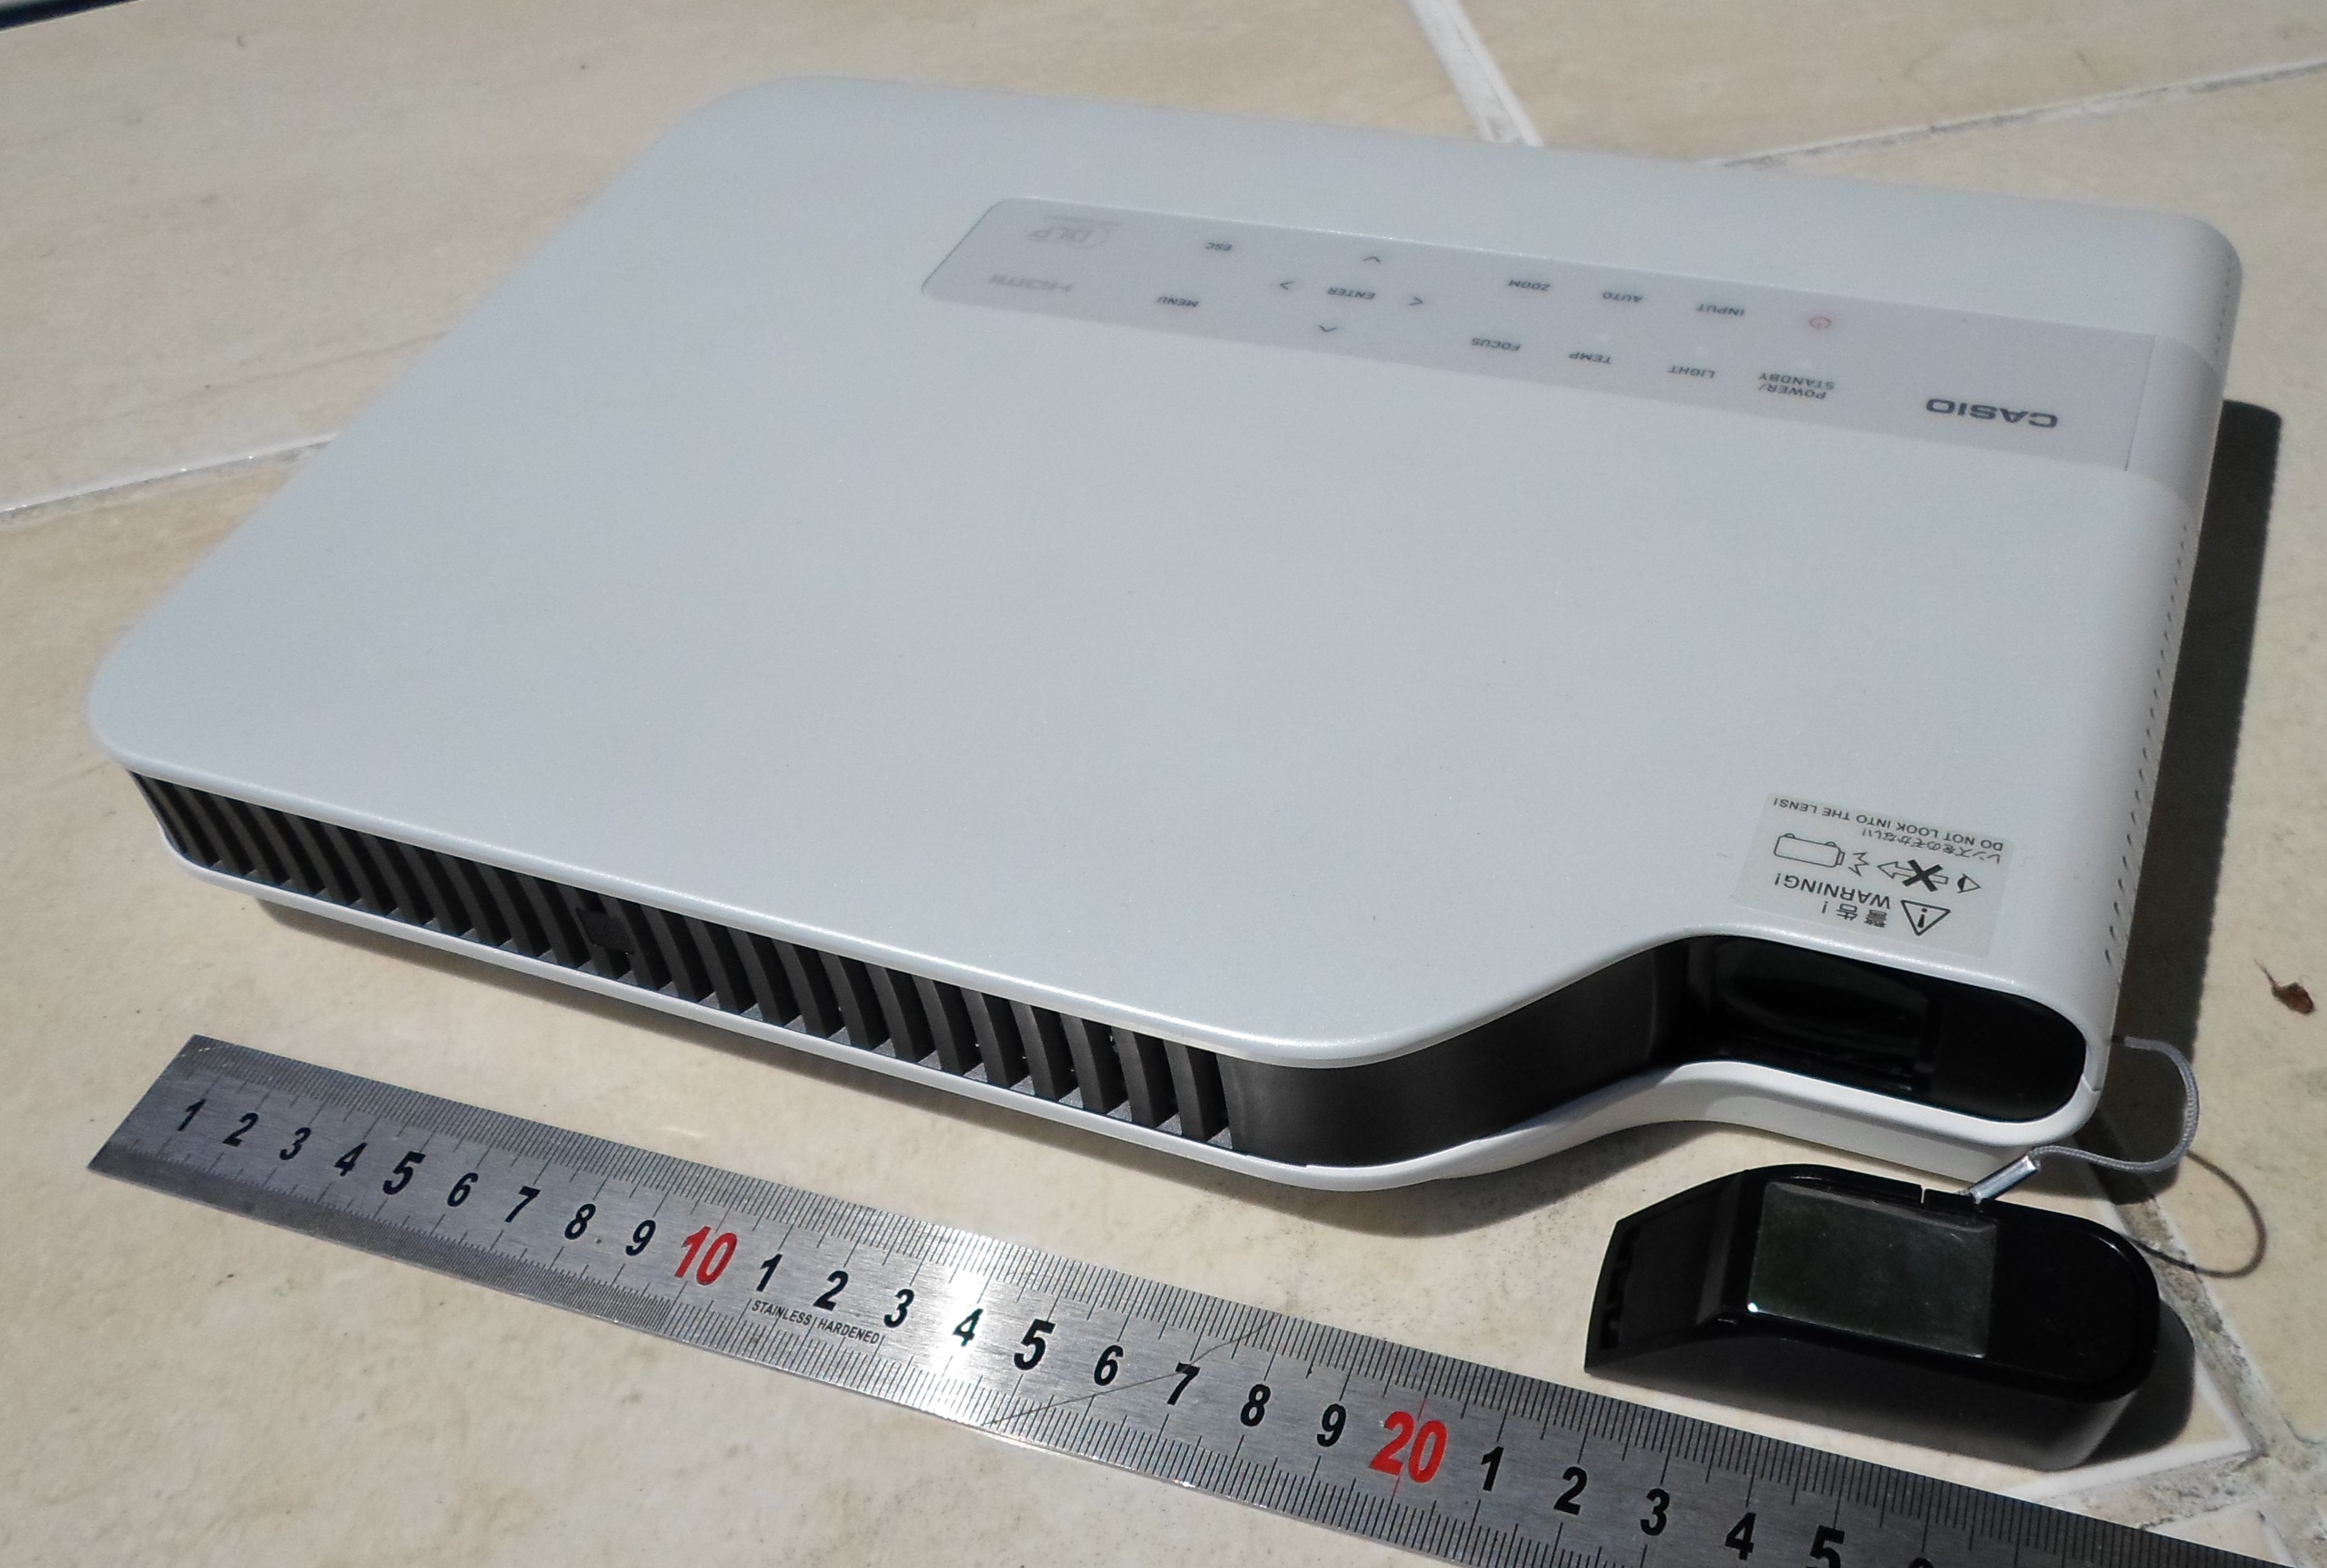
The slim XJ-A140 video projector itself:
The 24 x 445 nm laser diodes: 4 groups with 6 laser diodes Daisy chain connected so there are 8 wires (plus temperature sensors)
Each of the 24 laser diodes beam is collimated with it's own lens:
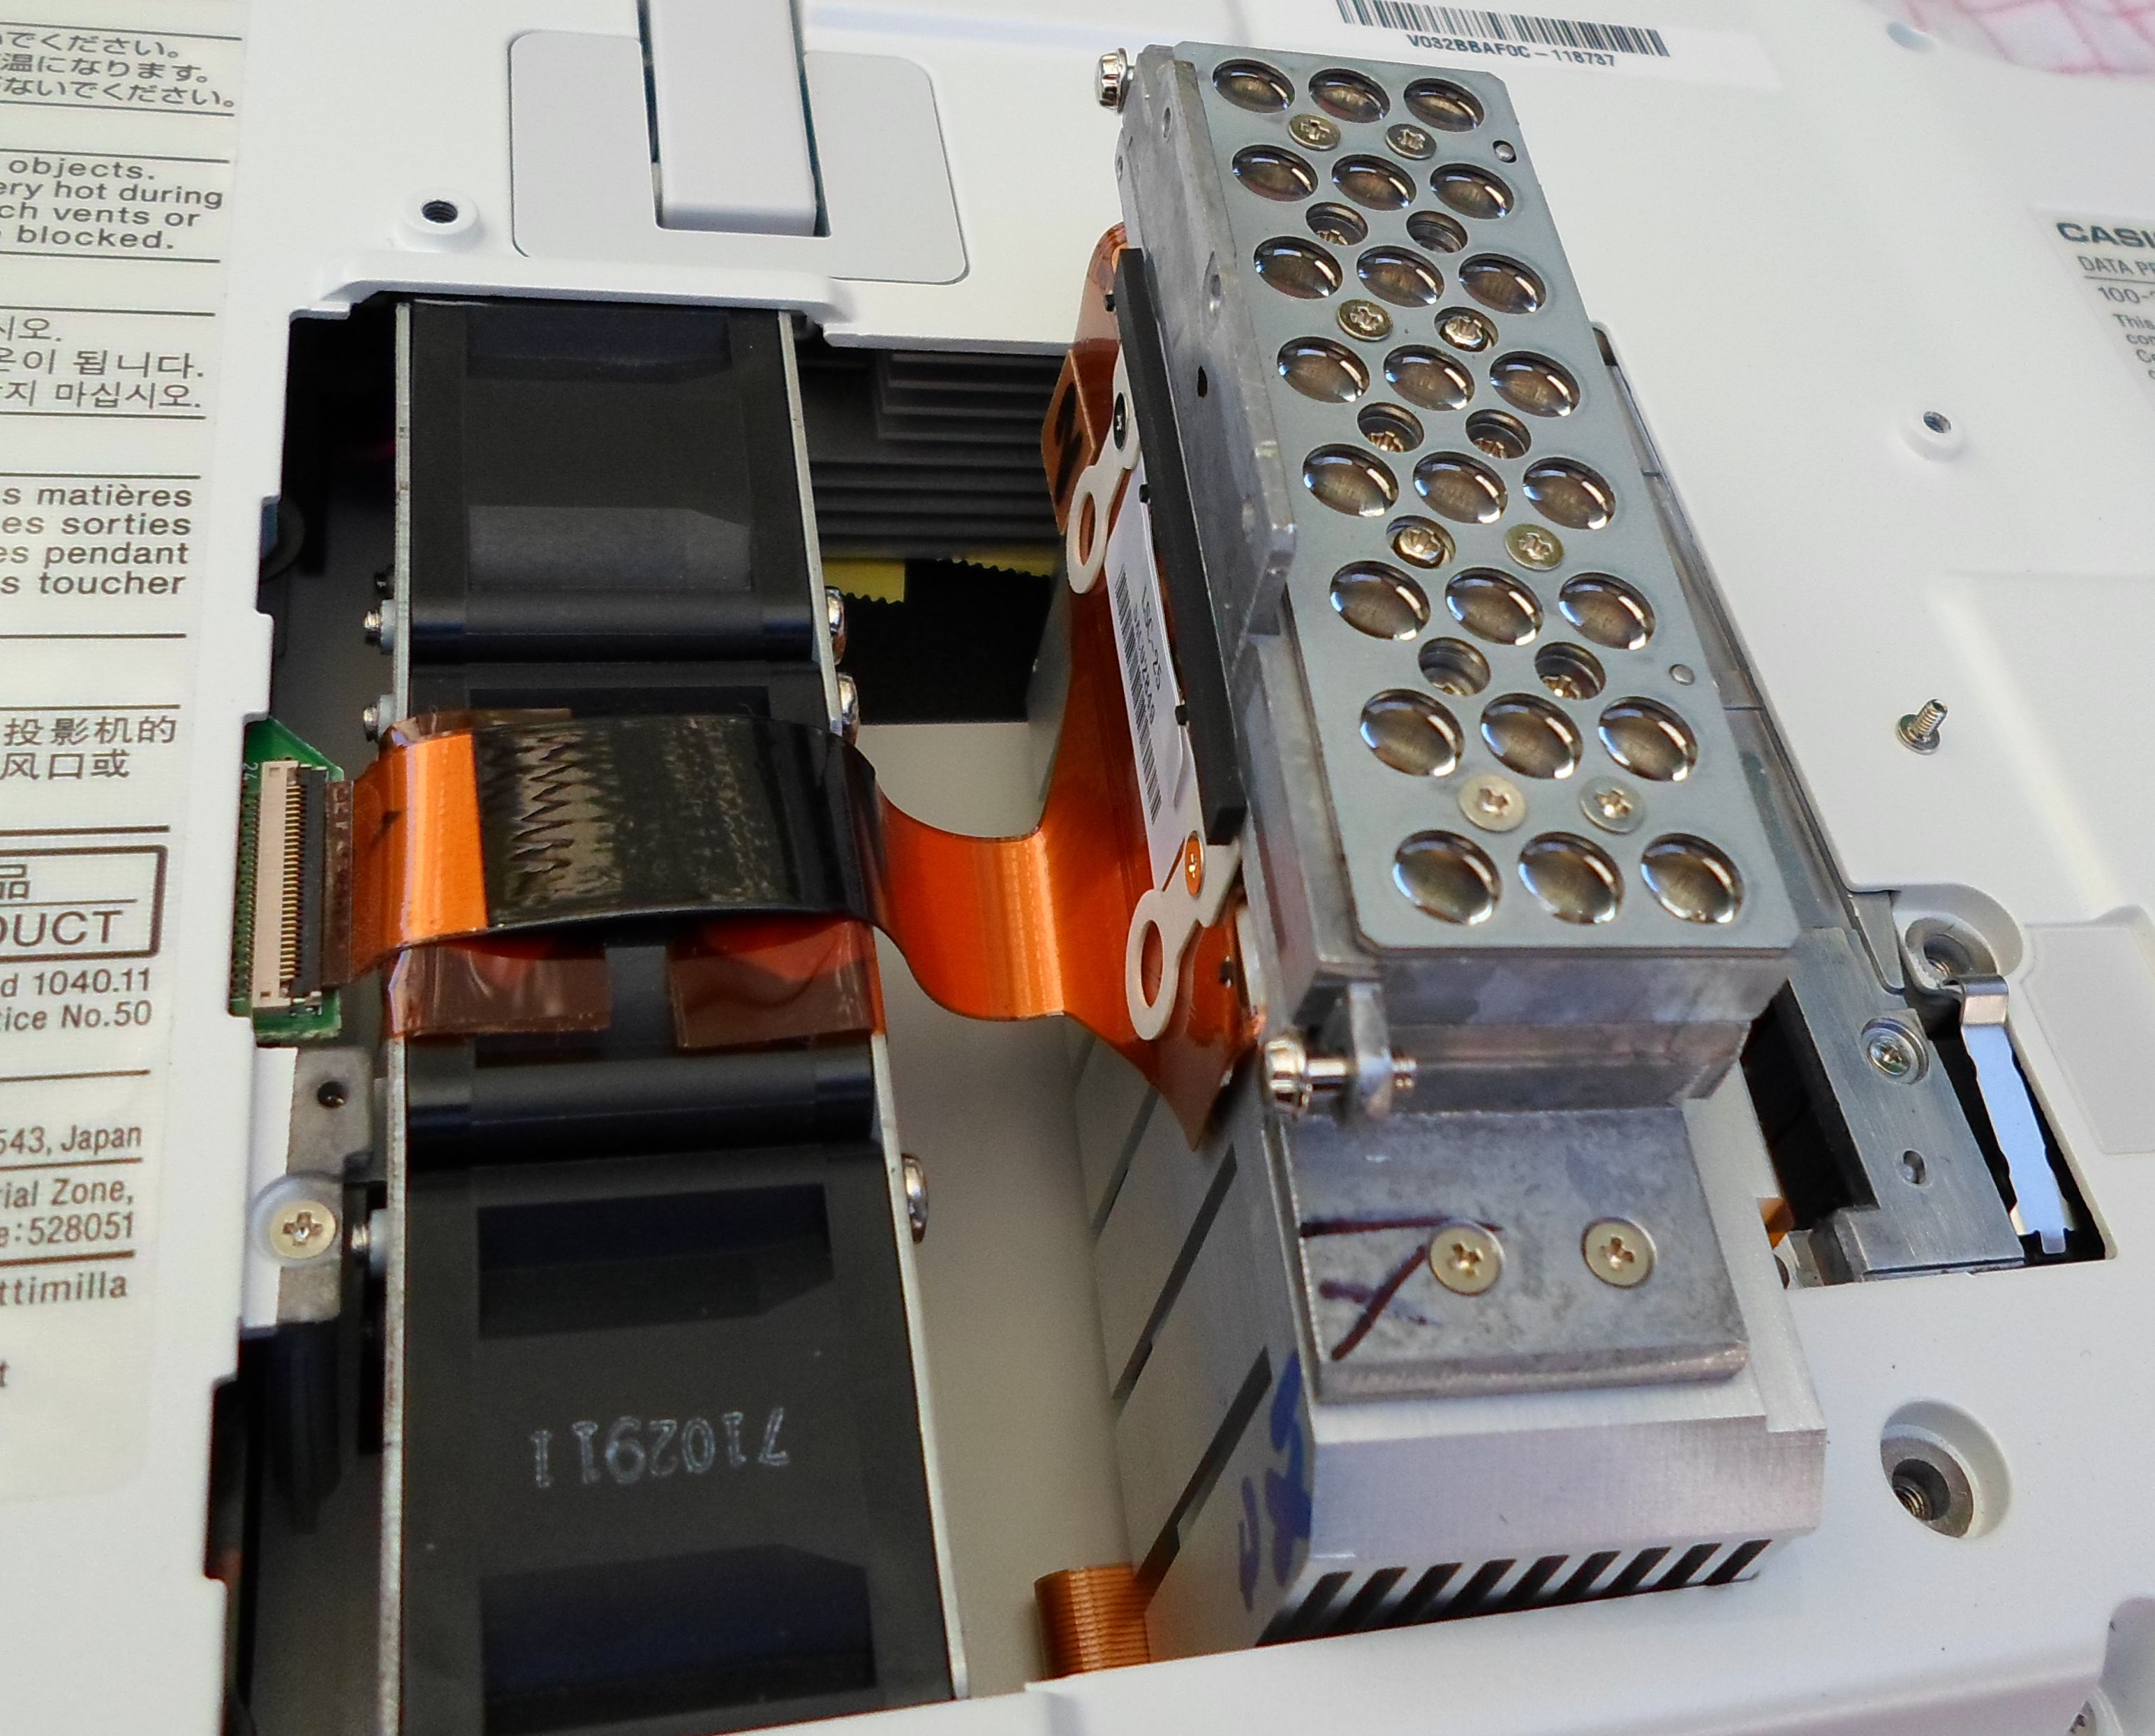
Jacob's ladder mirrors arrangement to send 24 // beams to the output lens (such a mirror arrangement isn't very easy to do for an amateur: here job is done :-) :
Preliminary tests:
Video: melting stones!
http://www.youtube.com/watch?v=xWqnyGhhJGo
http://www.youtube.com/watch?v=RZSzFt8Dkwc
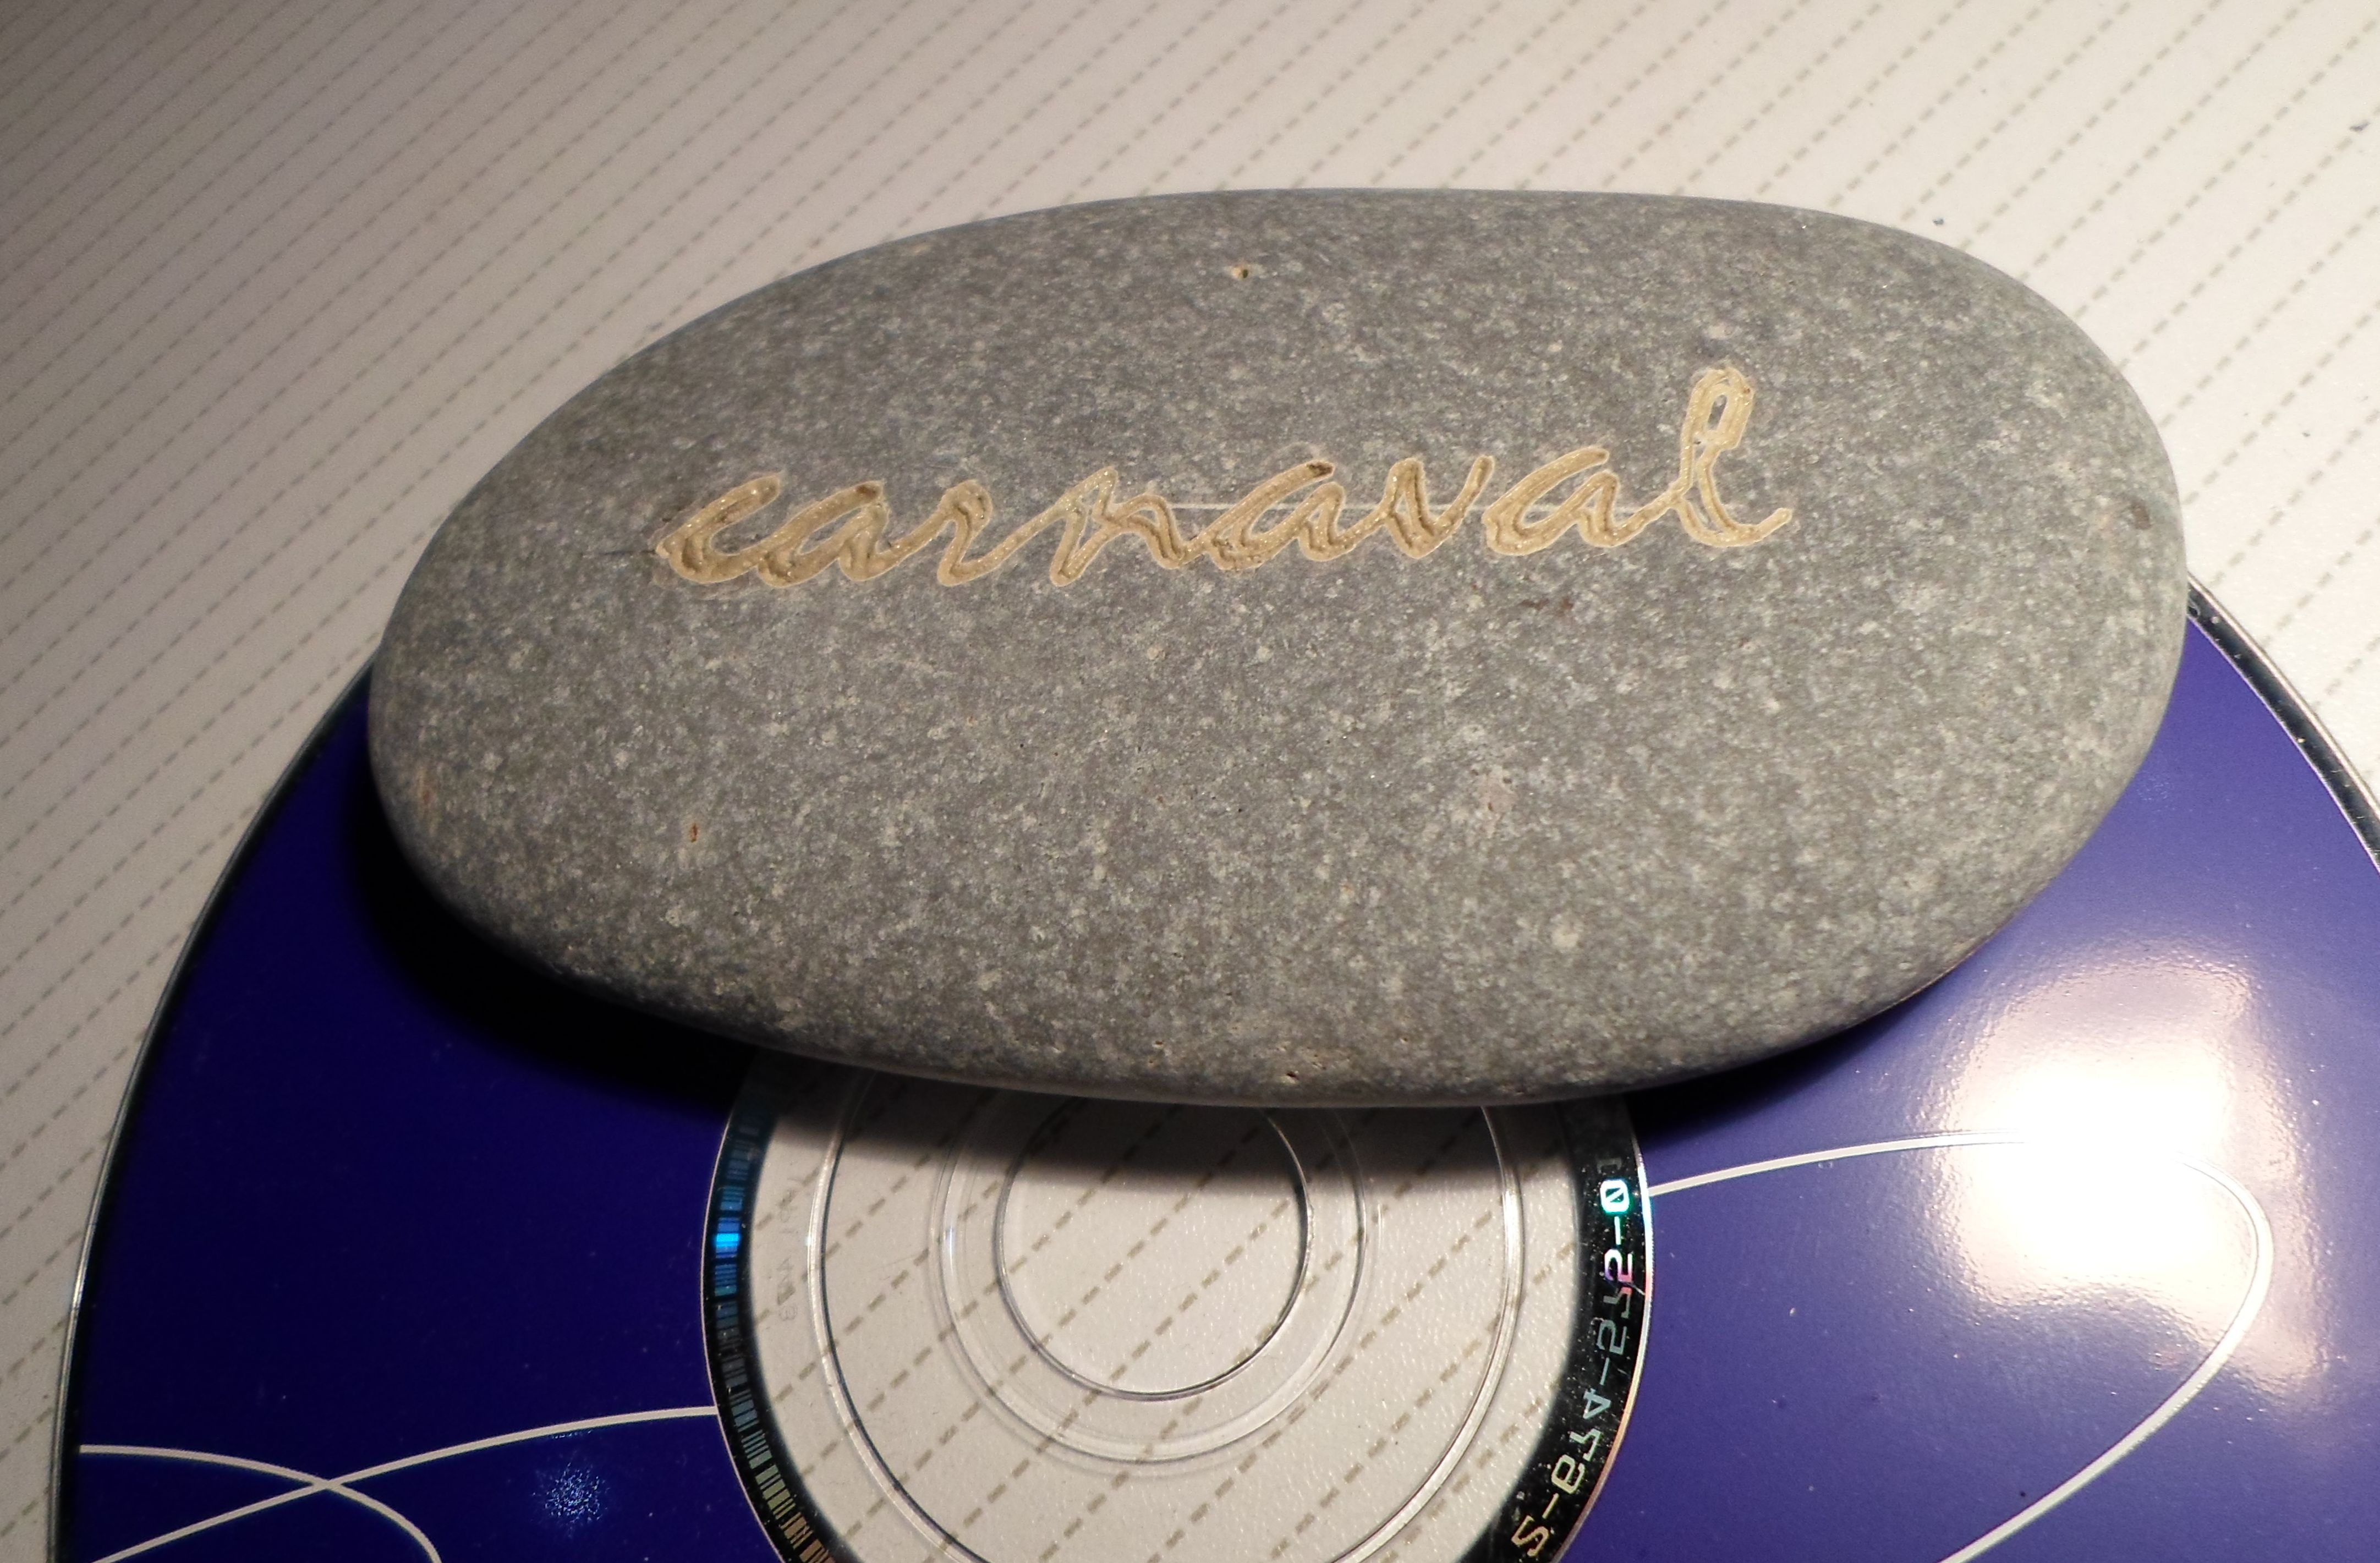
A stone (in fact, a piece of tile) has been melt with laser: stone has been transformed in a sort of glass !
To power the laser module, using Casio video projector isn't very convenient...
We use a 36 V adjustable 8 A switching power supply with some components, a On switch, a OFF switch

Here is the first complete version:
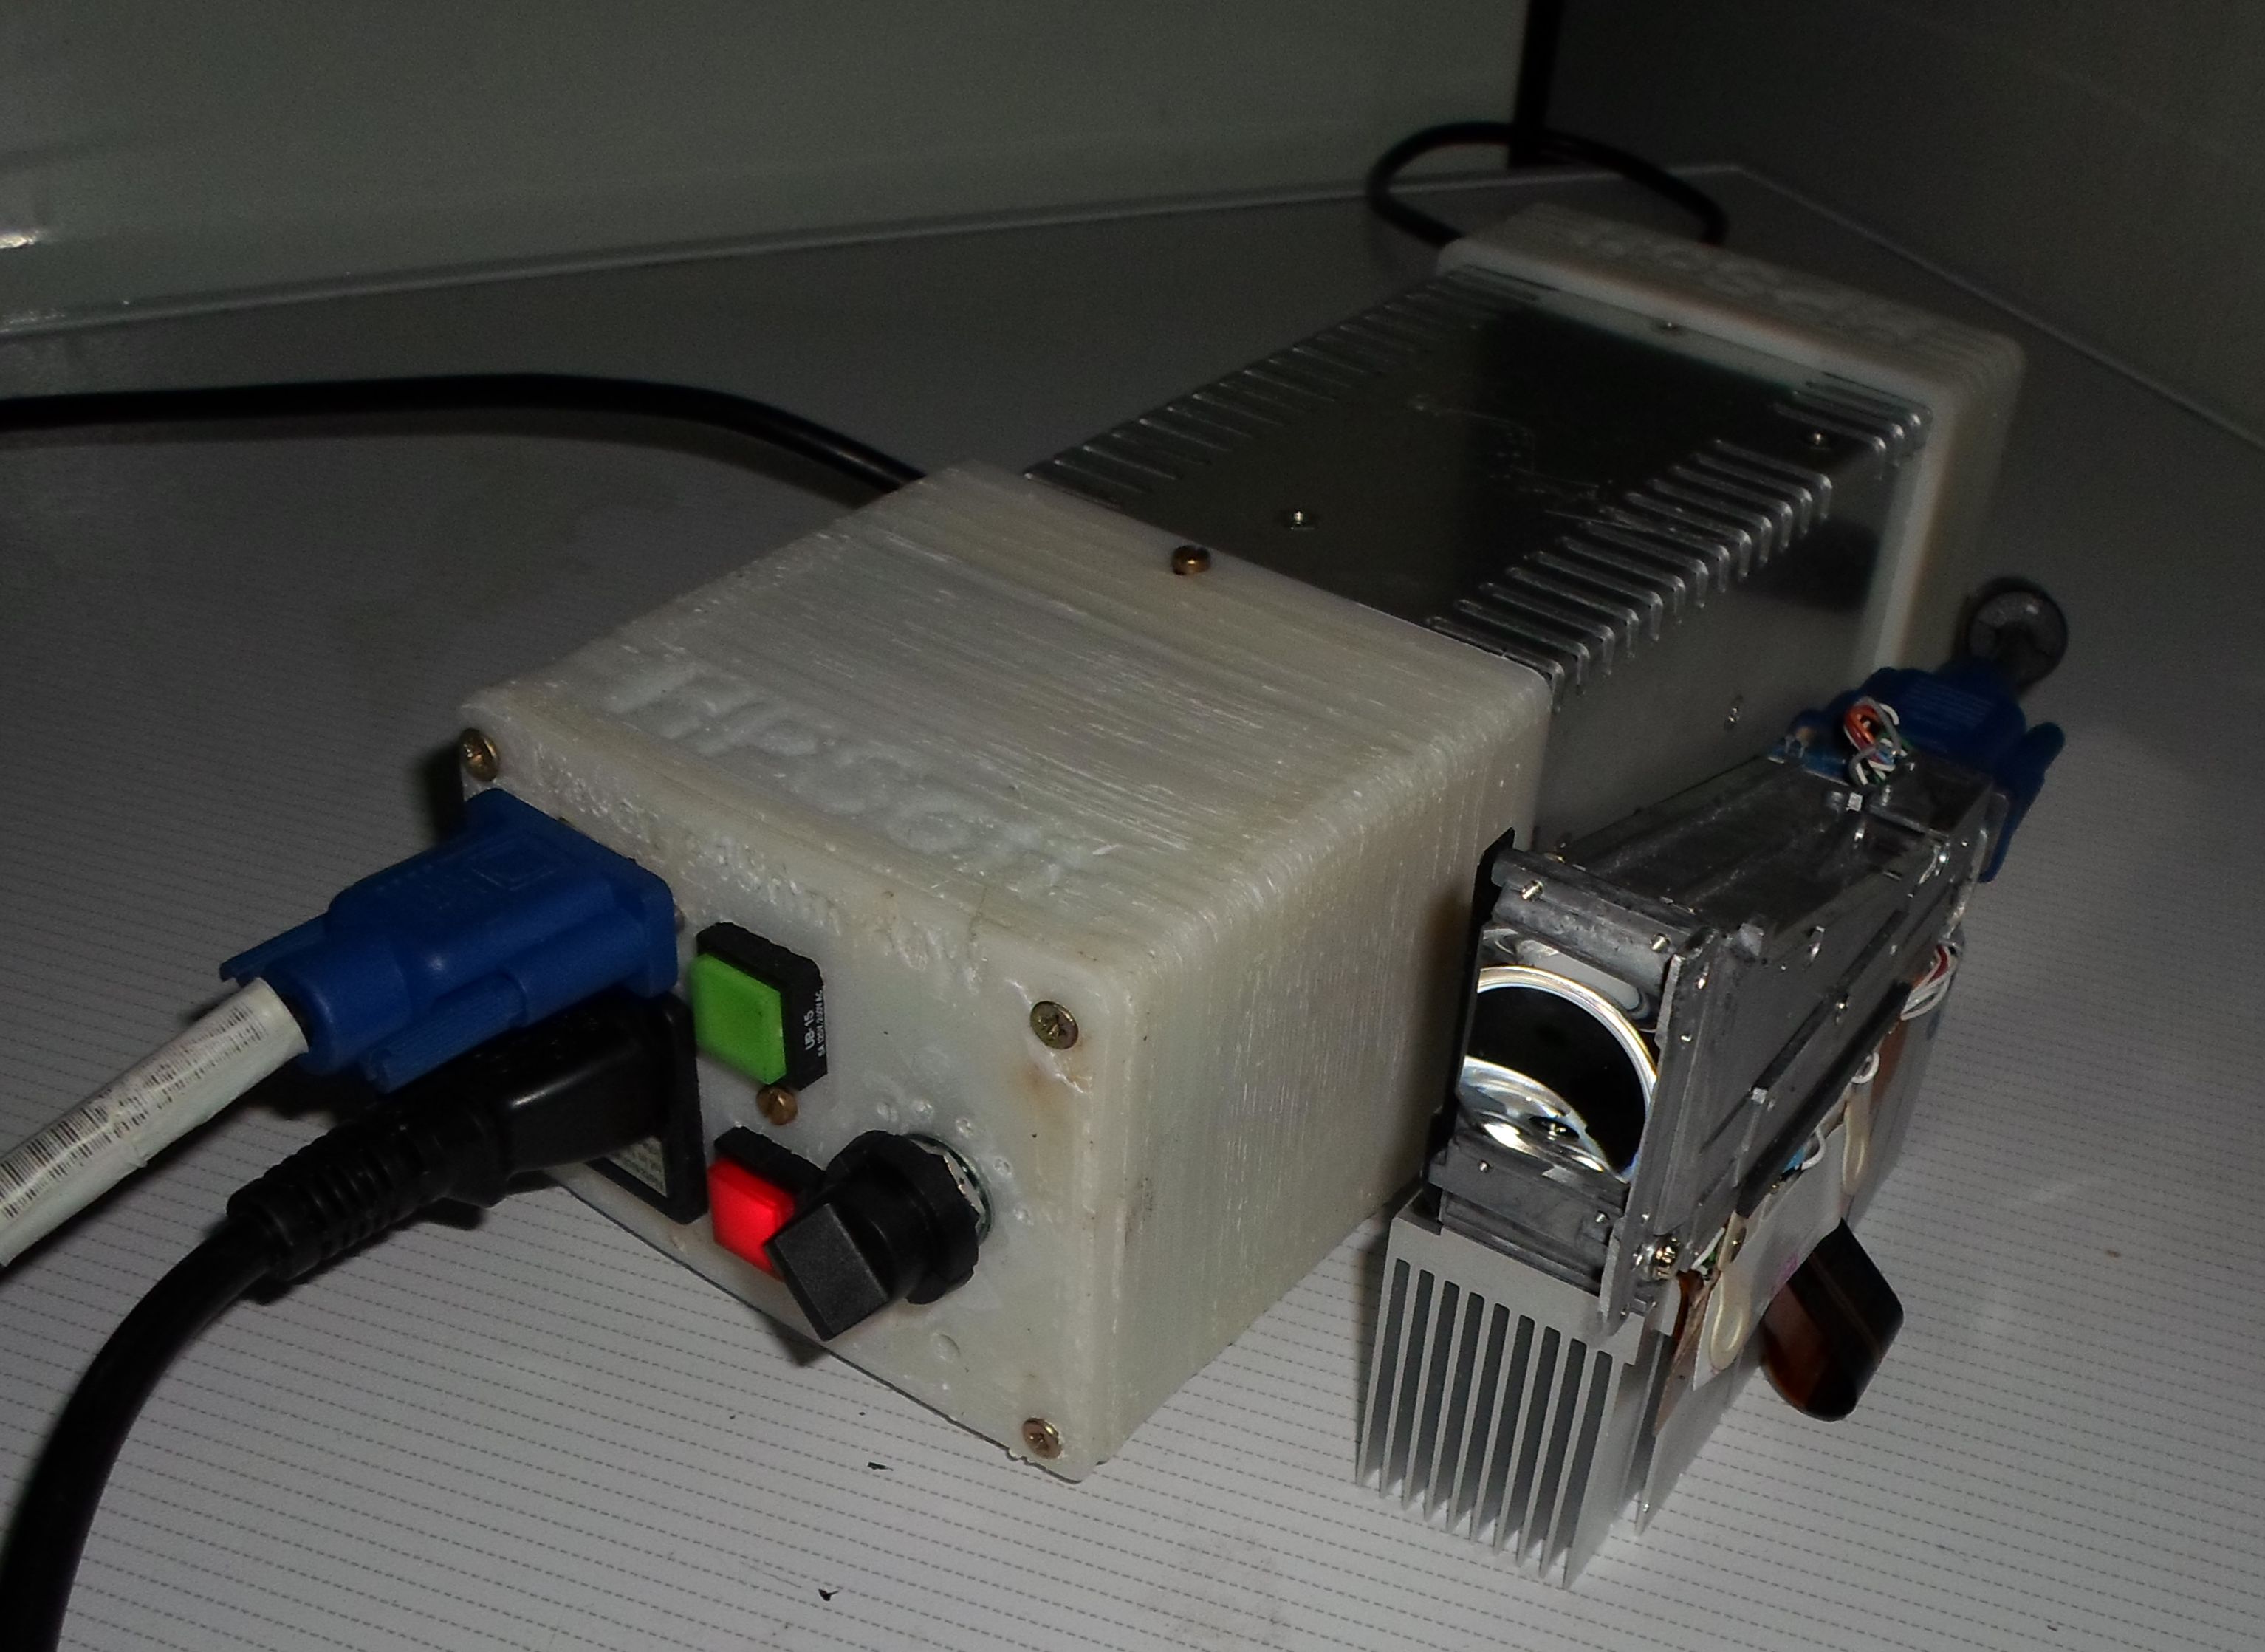
From left to right:
- Standard 2 m 9 pins SUBD cable connector
- Standard European 230V mains connector
- Green "ON" power
- Red "OFF" power
- Mains On/Off switch
- PSU (adjustable output from 26V to 32V, 8A)
- Laser module itself and it's output lens (fans are not installed)
Laser at very low power:

Complete test laser installation (but still without fans):
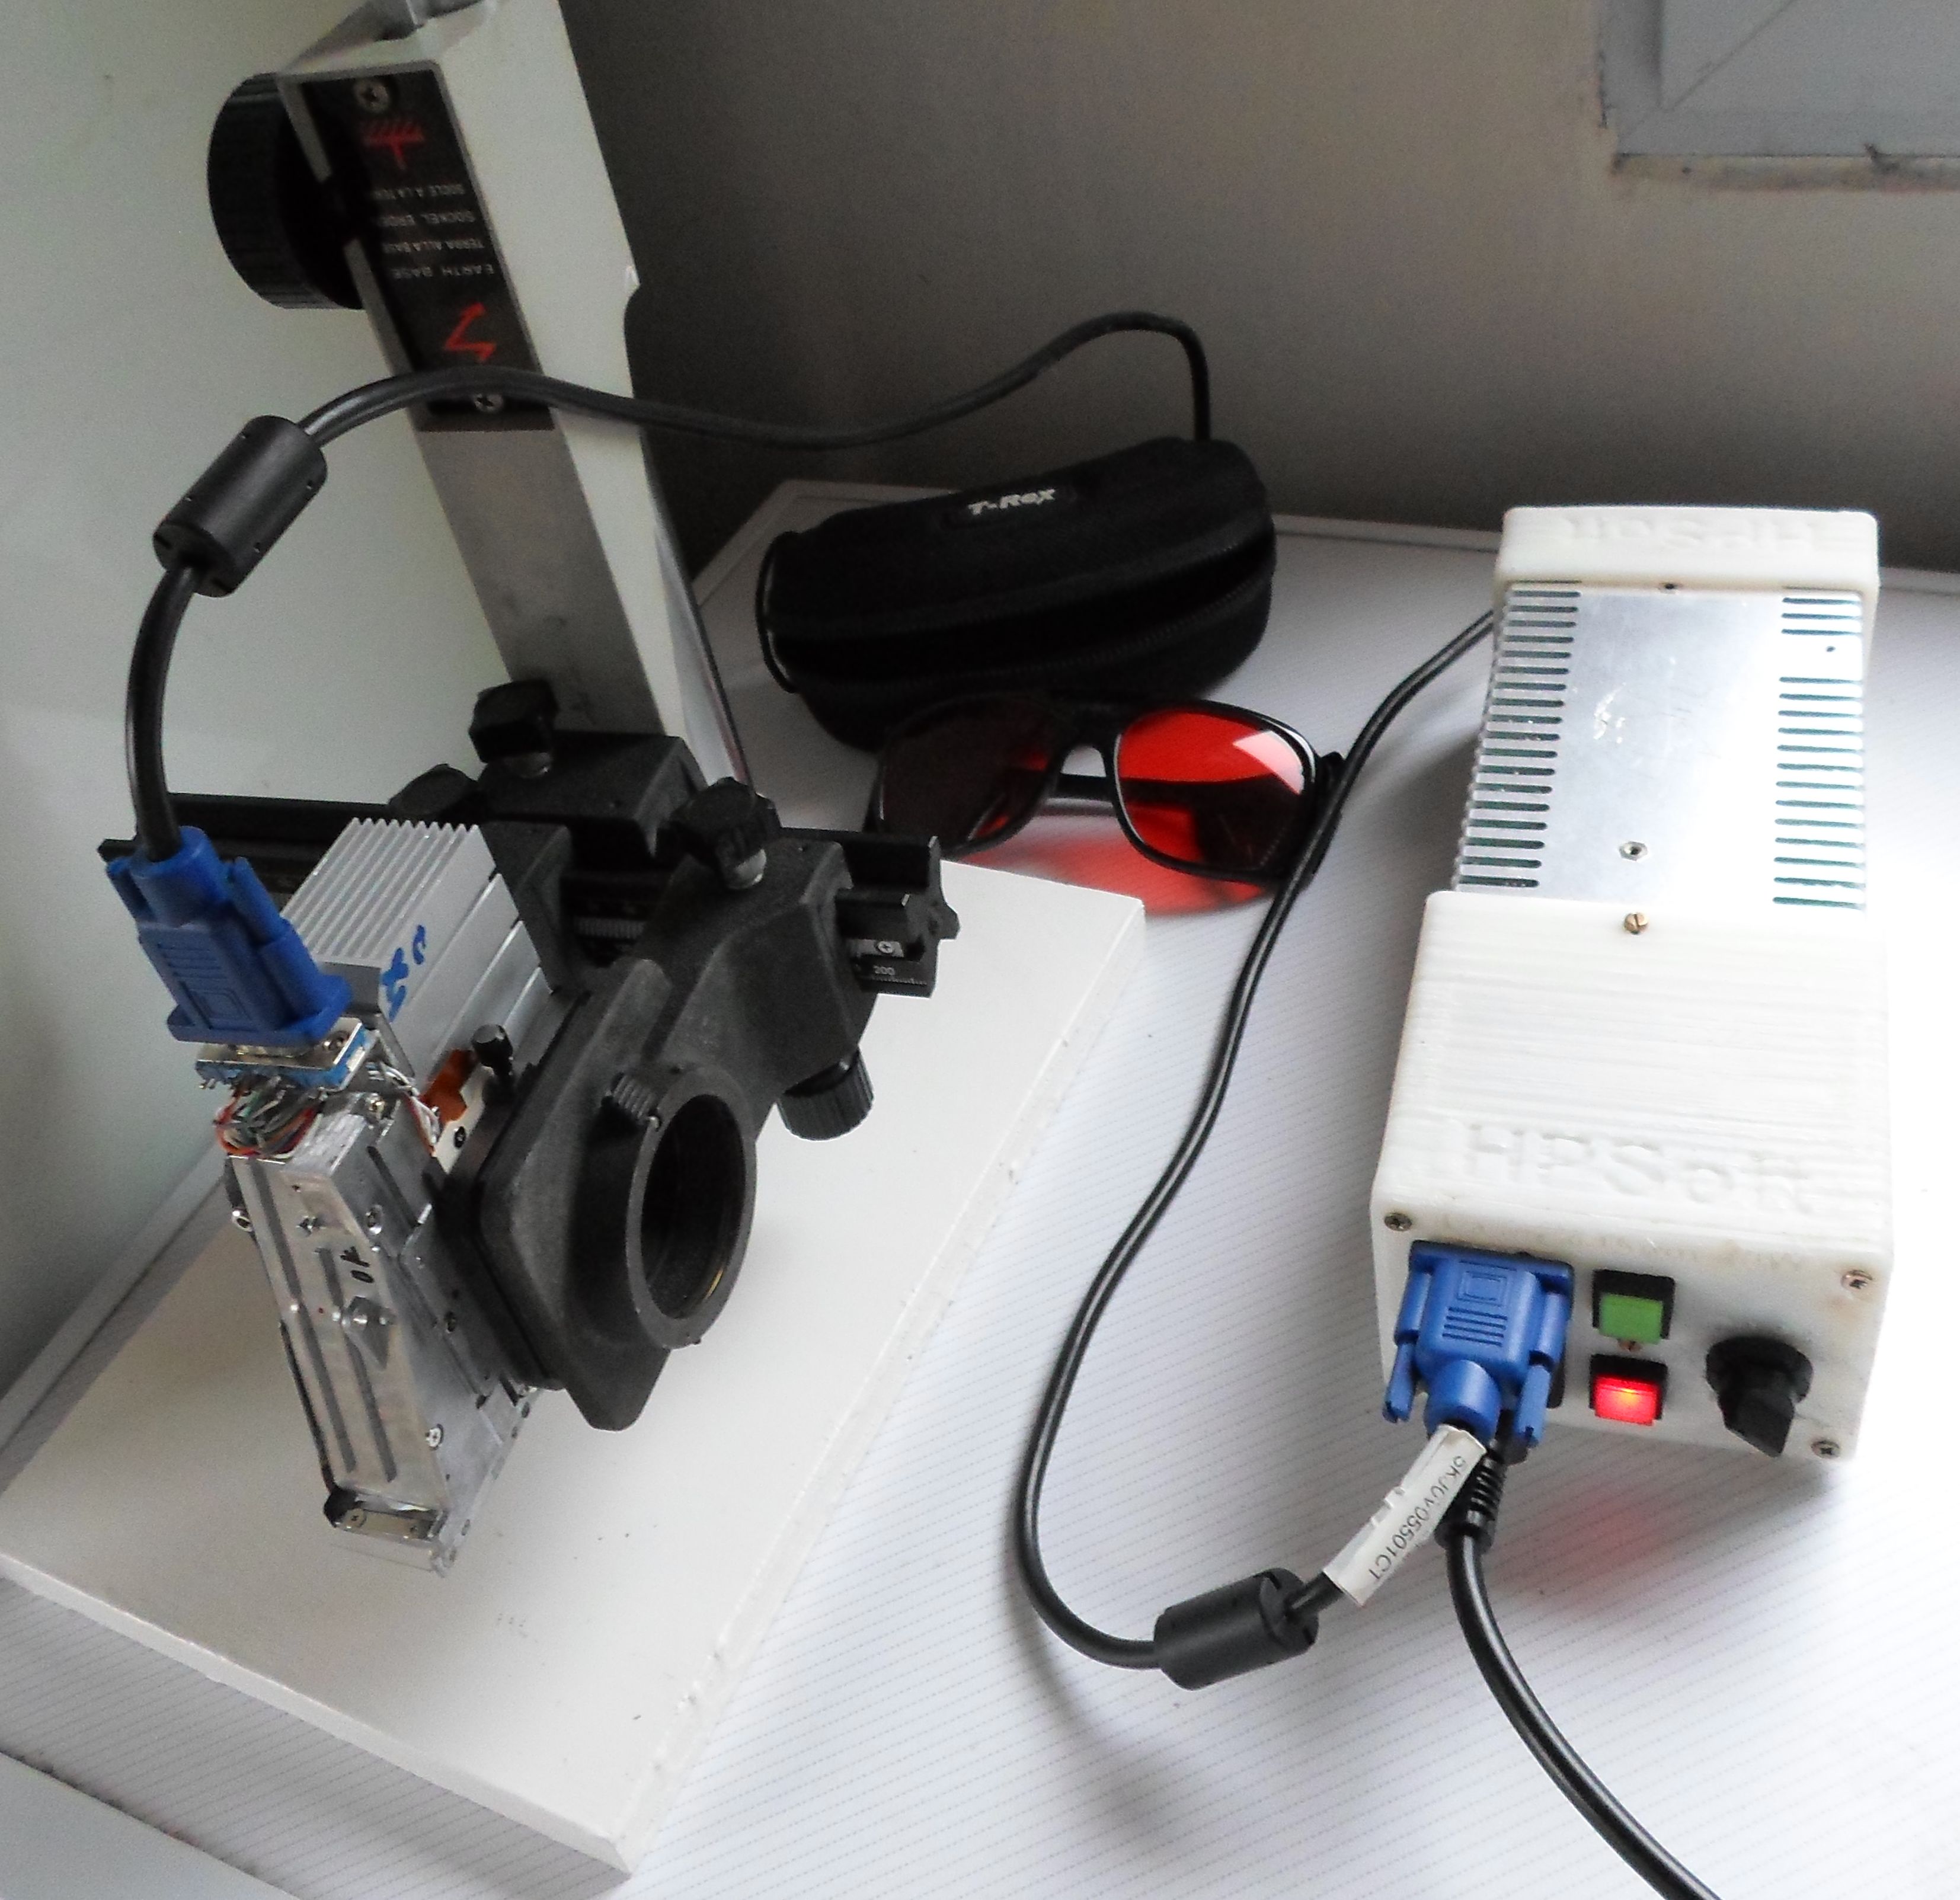
Note that a removable standard glass microscope slide has been added in front of output lens to protect lens from smoke and hot particles...
Another video: laser melting a piece of tile...
Then, we install laser head on a 3D printer to engrave a sea pebble...
The pebble basalt is melt in a light brown mixture...
Problem now is to evacuate heat from the laser head...
Cooling problem has been solved with 3 fans (from videoprojector),
A 12 V relay remote controlled with the 3D printer has bee added
A thermal protection and some other tricks:
Any comments?
E-mail :

17/11/13